|
|
|
|
|
|
|
|
|
|
 |
|
|
|
|
|
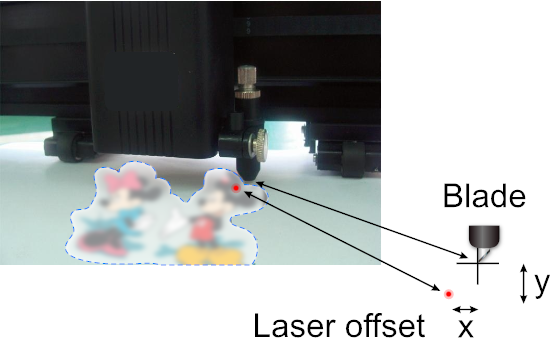
Set the Laser Pointer Offset |
1. |
To set or adjust a Laser
Pointer's offset which can vary from Cutter to
Cutter, Open the Vinyl
Spooler from the File menu
→ Cut/Plot → Vinyl Spooler; |
|
|
2. |
Click on the
Connection tab → Setup Device
and the Device Setup tab will come
up (click on this);
|
|
|
|
|
|
|
|
 |
|
|
|
|
|
|
3. |
Click Laser Offset and follow
the instructions.
|
|
|
 |
If it is not already, switch Use Laser
to On from the Units
options in the Device Settings which
you can access from the Settings menu
in the Vinyl Spooler or press
F2. |
|
|
|
|
|
Open the Contour Cutting Wizard |
1. |
In SignMaster Cut click on the
Pick tool
 |
|
|
2. |
Click on the Object or Objects that you wish to
Contour Cut (outline);
|
|
|
|
|
|
|
|
 |
|
|
|
|
|
|
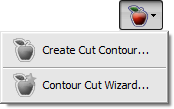
3. |
From the top toolbar, click on
Contour Cutting Wizard (as shown directly above) and
Contour Cutting Wizard will open. |
|
|
4. |
Check Manual to use the Laser Pointer. |
|
|
 |
You can also click on the
File
menu → Contour Cutting → Contour
Cutting Wizard. |
|
|
|
|
|
Step 1. Build Cut-Contours (outline) |
|
 |
|
|
|
|
|
|
1. |
Click Build
(as shown directly above) and the Create
Cut-Contour module will open; |
|
|
2. |
|
|
|
|
|
|
|
|
 |
|
|
|
|
|
|
3. |
Once the Contour Cutline has
been built, go through the view modes (as shown
directly above) to
check the Contour Cutline has been satisfactorily
created;
|
|
|
4. |
Proceed to Set
Output Options (next).
|
|
|
|
|
|
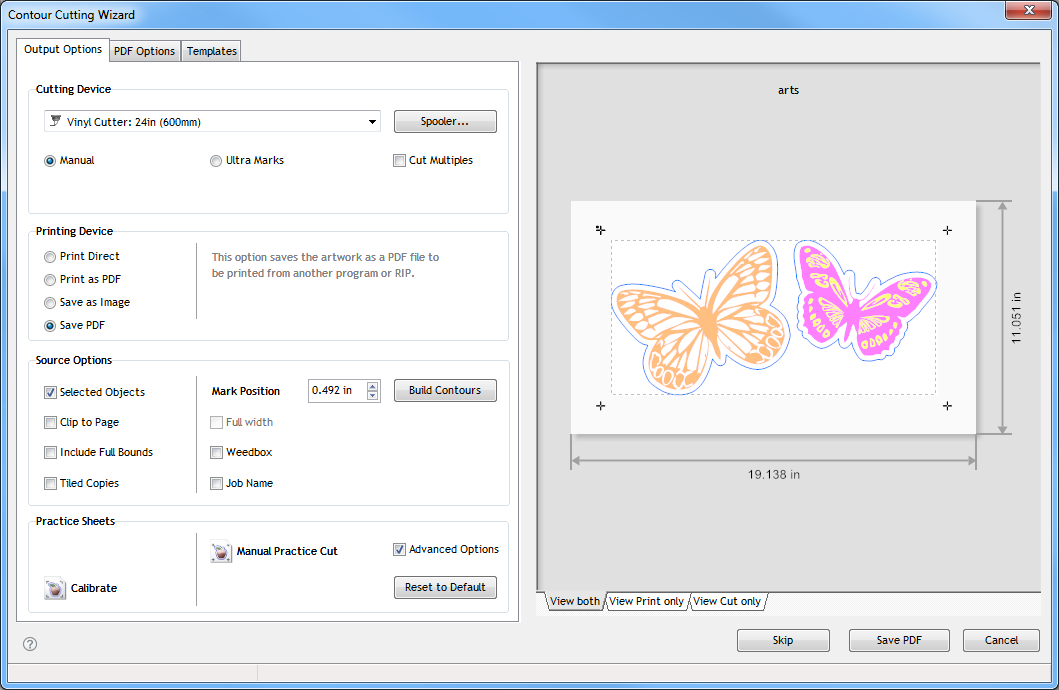
Set Output Options |
This includes several small and
related steps with some being optional, as follows: |
|
|
|
|
|
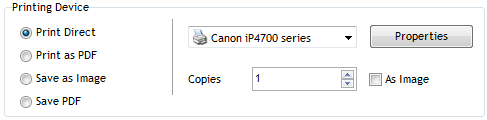
Select a Printing Device |
|
 |
|
|
|
|
|
|
|
Select which Printing
Device (method) you wish
to use to print the artwork out, outlined as follows:
The contour cutline will be cut out after the
artwork has been printed.
| |
Print Direct |
Sends the artwork
(with the registration marks) to the
selected Printer from the Dropdown list i.e.
via a Windows printer driver (suitable for
desk-top printing). |
| |
|
- Click
Properties to adjust your Printer's
settings |
| |
|
|
| |
Print PDF |
Sends the artwork
(with the registration marks) to Adobe®
Reader® and brings up the Print dialog. |
| |
|
|
| |
Save Image |
Saves the artwork
as a high-resolution .tif image which can be
imported into another program to print out
the artwork. |
| |
|
|
| |
Save PDF |
Publishes the
artwork to a PDF file. The PDF file is
normally used by another program to print
out the artwork or Adobe® Reader®. |
| |
|
|
| |
|
 |
| |
|
|
| |
|
- To adjust the PDF
Output click on the PDF Options
tab (as shown directly above); |
| |
|
|
| |
|
 |
| |
|
|
| |
|
- Preserve
Spot Colors sets any Spot Colors
within the artwork to retain the color's
detailed information within the PDF file. |
| |
|
- Convert
vectors to CMYK sets any vectors
within the artwork to be represented in CMYK
within the PDF file. |
| |
|
- Quality
Settings are used to set the level
of detail to retain or to set the file size
on disc smaller. |
|
|
|
|
|
|
Select a Cutting Device |
|
 |
|
|
|
|
|
|
1. |
Select the Vinyl
Cutter you wish to use; |
|
|
2. |
If required, click
Spooler to adjust your Cutter's
Settings in the Vinyl Spooler e.g. Blade
Compensation or to Switch the Laser option to On,
see tip directly below.
|
|
|
|
Switch Use Laser
to On from the Units
options in the Device Settings which
you can access from the Settings menu
in the Vinyl Spooler or press
F2. |
|
|
|
Auto Detect Marks will only be
available for Vinyl Cutters with built-in Automatic Registration Mark Sensing
(ARMS). |
|
|
|
|
|
Set Source Options
(optional) |
|
 |
|
|
|
|
|
|
|
The Source Options
(as shown directly above) refer to the artwork and
are optional, explained as follows:
|
Selected
Objects |
when checked sets the
Objects that were selected in the designing
area to be Contour Cut, all other artwork is
ignored. |
| |
Clip to Page |
when checked sets the boundary of the the
page's border from the designing area as the
artwork's extent. |
| |
Include Full
Bounds |
when checked sets all
of the artwork to be included in cutfile
(including any masked areas). |
| |
Tiled Copies |
when checked brings up
the quantity settings (see below). |
| |
|
|
| |
Mark Position |
sets the distance the
marks are set away from the artwork. Note:
setting this to less than 1 inch or 25mm may
cause the artwork to intersect the marks and
spoil the artwork. |
| |
Full Width |
when checked sets the
marks to the match the width of the artwork
allowing the artwork to take up more of the
media, which is ideal when printing on small
page sizes. |
| |
Weedbox
|
when checked applies a Cutline as a
perimeter around the artwork. |
| |
Job Name |
sets the name of the Job for PDF, the RIP
and the Vinyl Spooler to assist in managing
your work. |
|
|
|
|
|
|
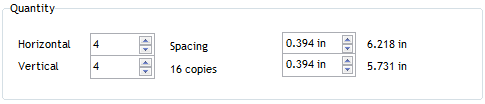
Set Quantity (optional) |
|
 |
|
|
|
|
|
|
1. |
Set the number of copies you
require and any spacing by using the up
or down arrows or typing in a a
value (as shown directly above); |
|
|
|
The wizard will indicate when the
Contour Cut Job will not fit within the Printer's media
size in the Preview window on the right-side. |
|
|
|
|
|
Step 2. Print the Artwork |
|
 |
|
|
|
|
|
|
1. |
Click Print
(as shown directly above) and depending on your
selection in Printing Device above your
artwork will either Print (from your selected
Desk-top Printer), or you will be prompted to save a
PDF or TIF file. |
|
|
2. |
Once you have successfully
printed your artwork and if
required laminated it, proceed to Step
3. below.
|
|
|
|
|
|
Step 3. Cut the Artwork |
|
 |
|
|
|
|
|
|
1. |
Load the
printed artwork into your Vinyl Cutter in a position
that fits within your Cutter's
maximum cuttable width (as shown directly above) -
Note: you can adjust for any rotation in the
Align Cutfile Wizard, as explained below; |
|
|
|
|
|
|
|
 |
|
|
|
|
|
|
2. |
Click Cut (as
shown directly above) and the artwork will be sent
to the Vinyl Spooler as a Cutfile waiting to Cut or
the Align Cutfile Wizard will
automatically open;
|
|
|
3. |
The Align Cutfile
Wizard is designed to assist you to
align the printed Registration marks with your
Vinyl Cutter. It guides you step-by-step with
detailed instructions in the top left corner of the
module which is much easier to follow while
performing a Contour Cut rather than referring to a manual.
Important
Even a small
misalignment is likely to result in poor results. So
it is important to use a magnifying glass when
aligning the laser pointer with the printed
Registration marks to obtain the best possible
results.
|
|
|