|
Overview
System colors are provided for you to be able to
differentiate between standard fill and pen colors and
those colors used by your device(s) to perform certain
functions such as contour cutting i.e. by setting a fill
or pen style as a system color when you output your
artwork to say a printer/cutter the RIP and Vinyl
Spooler send the relevant commands to your device, as
shown in this example:
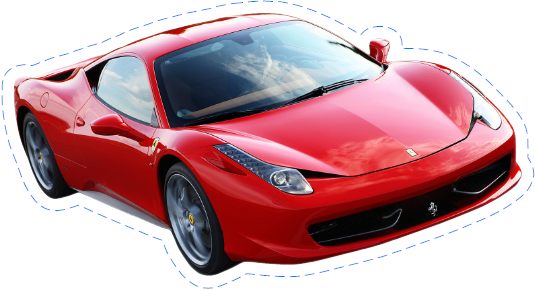 |
| |
|
Image with a Contour Cutting Line |
| |
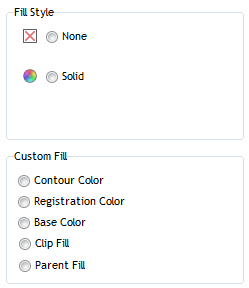
There are currently 5 standard system
colors, as follows:
|
Contour Cut Color:
|
This color indicates that the
curve/line is a Contour Cutting Line (RIP, Printing and
Cutting) |
|
Registration Color:
|
This color indicates that the
object is a Registration mark or Symbol (RIP and Printing) |
|
Base Color:
|
This color indicates that the
object is to be printed as an Underbase or Finisher (RIP) |
|
Clip Fill:
|
This fill indicates that the
Object is a Clipping path for a Power Clip |
|
Parent Fill:
|
This fill indicates that the
selected Object is using the fill above it in
the Object Manager such as it's group |
|
|
Note:
This allows groups of objects to share the same
gradient, image fill etc. rather than having
the nodes different for each one. |
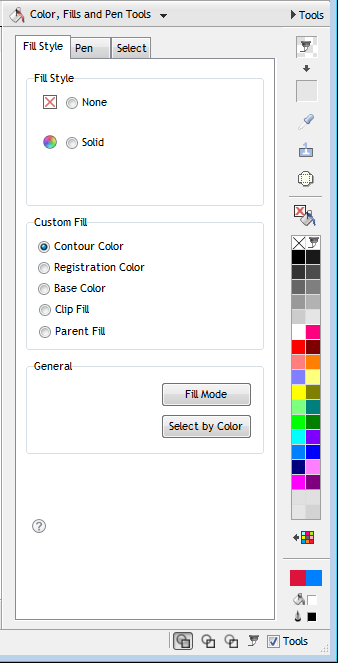
Set System Colors
System colors are automatically set by the program, when for example
you create a Contour Cut line or Insert
Registration marks etc. However to manually set a System
color select the Object and click on the required System
Color by selecting Other from the
Color, Fills and
Pen Tools in the
DesignCenter (as shown directly
above) and that color will be identified when
outputting the artwork to a large format printer,
printer-cutter or vinyl cutter. |