Previous related topic...Next related topic...

Workspace and Settings

Future Corporation Help

On This Page

Overview

Fully Customizable

Create a Dynamic Guide

Create a Standard Guide

Apply Origin Guides

Apply Baseline Guides

Edit Guides

Snap to Guides

Adjust the Guide's Appearance

View (Display) Guides

Working with Guides

Guides

Mixture of Standard and Dynamic Guides

Overview
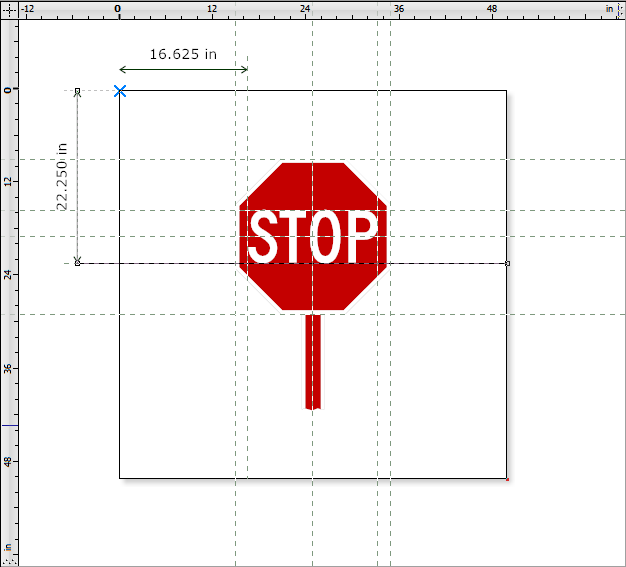
Guides provide a quick and easy way to accurately position and layout objects in the drawing area. SignMaster Cut comes with two types of Guides, the first type are Dynamic-Guides i.e. the Guide locks its x and y position from where it displays the Guide's position from. The other 
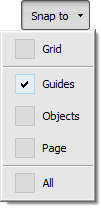
type are Standard Guides i.e. horizontal and vertical guidelines that Objects can be set to Snap to.
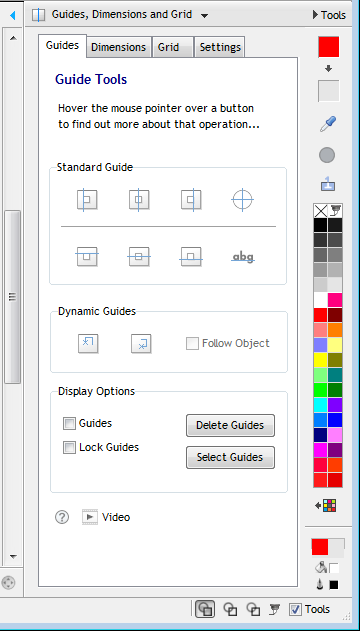
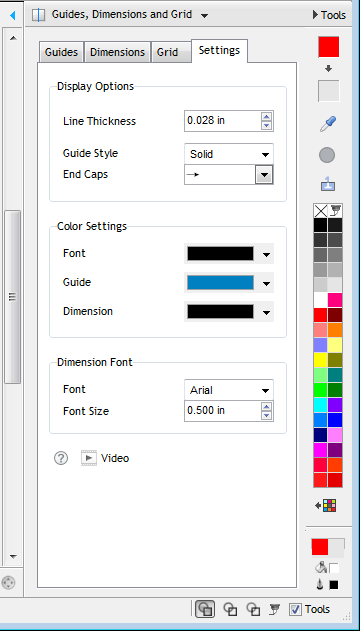


Fully Customizable
SignMaster Cut's Dynamic Guides allow you to set their line thickness, color and end caps, along with their font, color and the point size as shown in some simple examples above.

Working with Guides

To

Do the following

Create a Dynamic Guide Tool Panel
1.

Click on Tools (as shown above) to bring out the DesignCenter, select Guide, Dimensions and Grid and then the Guides tab, (as show directly below);

Guides Tools
2. Click on the Object(s) that you wish to fit a Dynamic-Guide to and a Dynamic-Guide will be inserted and locked to the target object.
Please note You can edit the Dynamic-Guide's position by clicking on and sliding its Nodes.
Create a Standard Guide
1. Click on the Guide flyouts then the required Horizontal or Vertical Guide (as shown directly above);
2. Click anywhere in the Drawing area and a Guide will be Inserted, or;
3. Click and hold down the mouse button then drag out the Guide.
You can also Fit a Standard Guide to the Left, Right, Top, Bottom, Center or Bottom of a selected Object from the Standard Guides, as shown above in the Guides tab.
Please note You can edit a Standard Guide's position by clicking on it and sliding it either up or down - or - left or right, or setting its position in the Size tools (2nd row of tools in the program).
Helpful tip You Can Also - Click on the rulers and drag out Guides to create them; and also Edit Guides from the Property Inspector
Apply Origin Guides Please note Origin Guides - These guides are applied to the Origin Point of the selected Object i.e. the point where the Object is measured from.
1. Select the Object you wish to apply an Origin Guide to and click the Origin Guides button
Apply Baseline Guides Please note Baseline Guides - These guides are applied to the Baseline of the selected Text i.e. the typographic line along which the text is typed along.
1. Select the Text you wish to apply a Baseline Guide to and click the Baseline Guide button
Edit Guides
When a Dynamic-Guide is selected the Guide tools will appear in the 2nd row of tools (as shown above) and a smaller sub-set of these tools for Standard Guides, explained as follows:
Select Guide Type: Sets the Selected Guide to either a Dynamic or a Standard Guide
Guide Position: Sets how far a Dynamic-Guide is offset (set away from) its Anchor Point (where it x and y coordinate is positioned)
Left or Right: Sets a Dynamic-Guide to flow from either the Left or Right side of its Anchor Point (either a negative or positive x position)
Set Anchor Point: Locks a Dynamic-Guide's x and y position at its current position so that measurements can be taken from that position
Linked: Sets a Dynamic-Guide and its Target as Linked or Unlinked i.e. Disconnects/Reconnects an Dynamic-Guide from/to its Target Object
Lock Guides: Locks the Guide so it cannot be manually positioned
More Tools: Opens the Guides Tool Panel (as shown above)
Helpful tip If you select a Guide in the Object Manager you can change its position even if it's Locked
Snap to Guides
You can set Objects to Snap to Guides by clicking on the Snap to dropdown from the 1st row of tools and either selecting Snap to Guides or Snap to All (as shown directly above).
Adjust the Guide's Appearance
You can adjust the appearance of the Dimensions and Guides by opening the Guides Tool Panel as explained in the first lesson (above) and clicking on the Settings tab (as shown directly above).
View (Display) Guides You can set whether or not Guides are displayed in the Drawing Area by checking/unchecking the Guides checkbox (as shown at top).

Dimensions and Guides appear in the Object Manager and Property Inspector where you can adjust their appearance and whether or not they can be viewed.


Related Topics

Working with Dimensions
Working with a Grid
Working with Rulers
Display Modes


| |