|
Overview
SignMaster Cut provides a number of on-screen and
procedural tools to size and position all
objects including curves, images, shapes and text plus
all the effects which can be applied to these objects
within a Document.
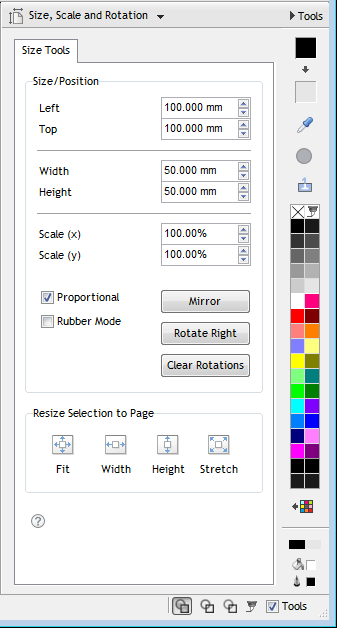
Size and Position
Tools
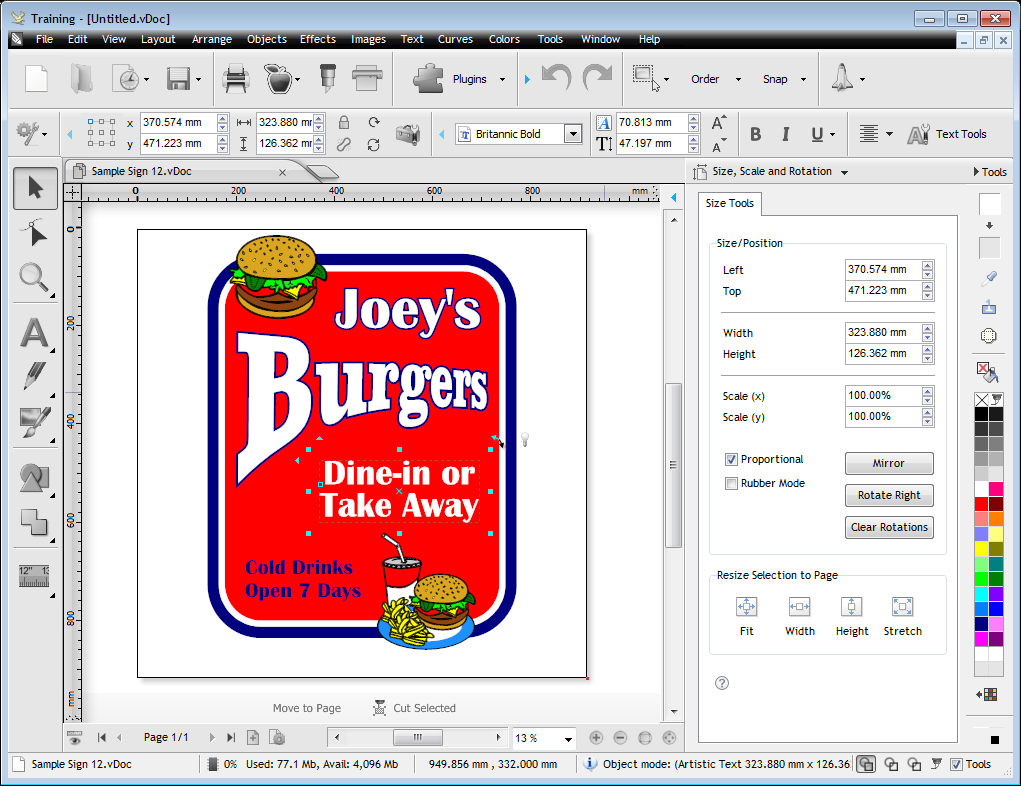
For regular editing a set of commonly
used size and position tools become available when an
object is selected from the Toolbar in
the second row of tools (as shown in the SignMaster Cut
Application window above). The more advanced tools are
located in the Size Tools Panel on the
right-side of the program, also shown above. Both sets
of tools are explained in detail (below).
Advanced Size and Position Modules
SignMaster Cut comes with 3 specialist modules to Measure,
Resize (Re-scale), and Rotate (Re-rotate) objects. These
modules are designed to provide you with very precise
control over any objects in the designing area.
 Reveal/Hide Tools
To keep a focus on common
tasks and avoid cluttering the toolbars, many of the advanced
tools and features are hidden from normal view but can be
instantly accessed by clicking on the Reveal/Hide
Advanced Tools button as shown directly above.
Working
with Anchor Points
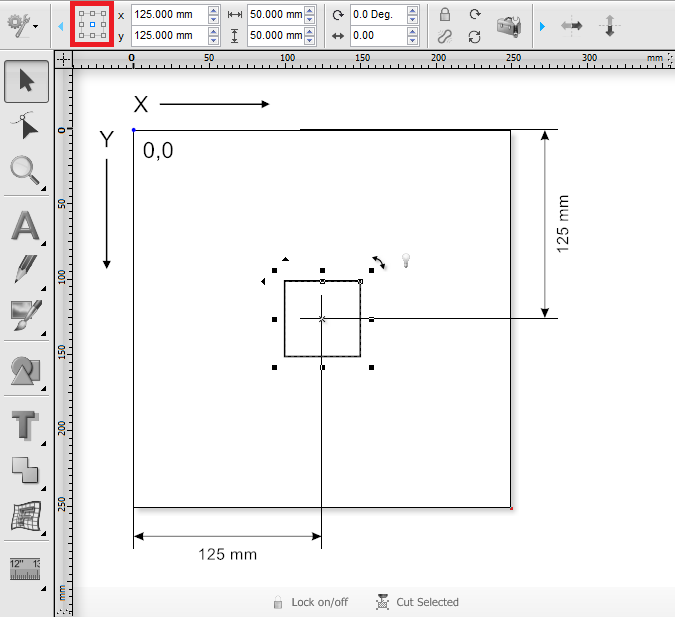
SignMaster Cut allows you to measure the distance from the
page's origin (top left corner by default - see above)
to any one of the 9 positions of any object or text as
shown in the Anchor Point icon (see above). By clicking
on an Anchor point the distance from the page's x and y coordinates will be automatically displayed in the x and
y origin. |