|
|
|
|
|
|
|
|
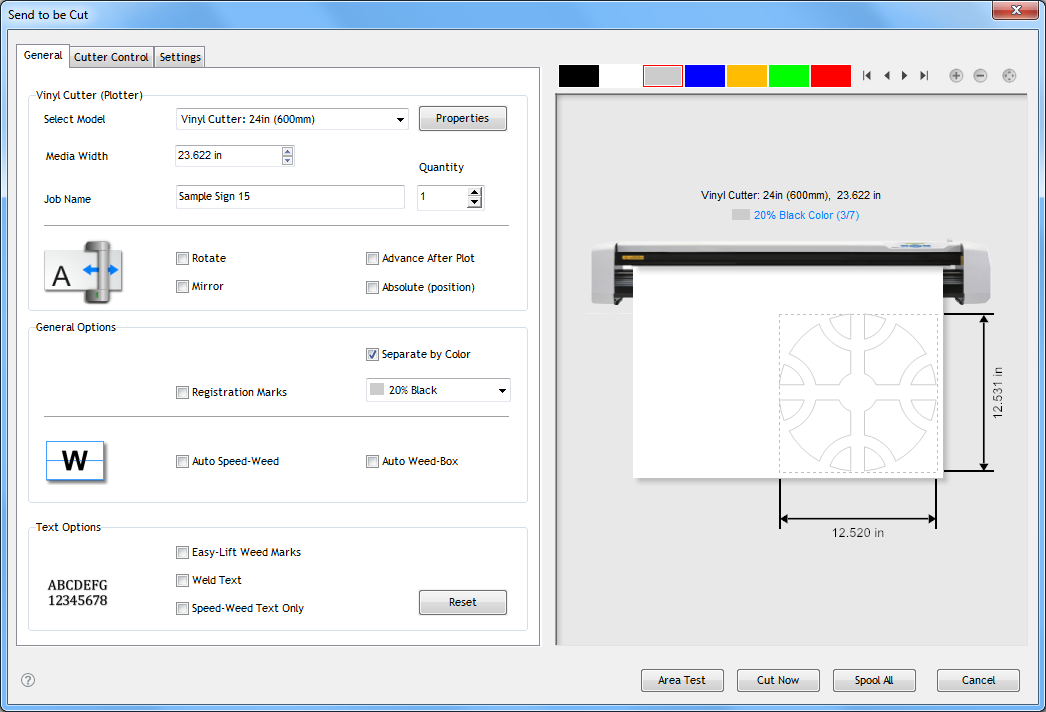
Open Send to Cut |
1. |
Click on the
Pick tool

|
|
|
2. |
Click on the Object
that you wish to Send to Cut; |
|
|
3. |
Click Cut
 which will open with the
selected object (as shown at top). which will open with the
selected object (as shown at top). |
|
|
 |
You can also click on the
File
menu → Cut/Plot →
Send to Cutter |
|
|
|
|
|
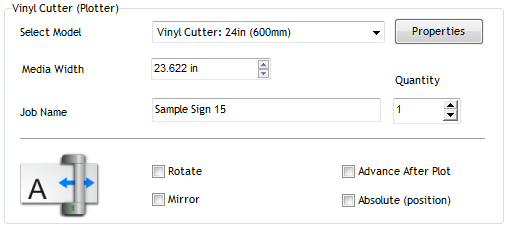
Select Cutter and Orientation |
|
 |
|
|
|
|
|
|
1. |
Select the Cutter
you wish to send your artwork to cut with;
|
|
|
|
The Media width is the maximum
cuttable width of your cutter,
not the physical width of the media (vinyl/paper/card)
i.e. what your cutter can actually cut. |
|
|
2. |
Set the Orientation
by clicking each checkbox, such as Rotate and Mirror to
save media or to cut in reverse; |
|
|
3. |
If required select
Absolute Position to force the artwork to cut
where it has been positioned in the Designing area. |
|
|
4. |
If required select
Advance After Plot to feed out the media to the
end of the cutfile after being cut. This is ideal if you
prefer that the media feed out after the cut has
completed so you can slice it off and start the next
cutfile. |
|
|
|
Properties brings up the Device
Settings window from where you can set Blade
Compensation, Overcut and many other settings. |
|
|
|
Important: Each
selection applies to all Cutfiles in the current
project. |
|
|
|
|
|
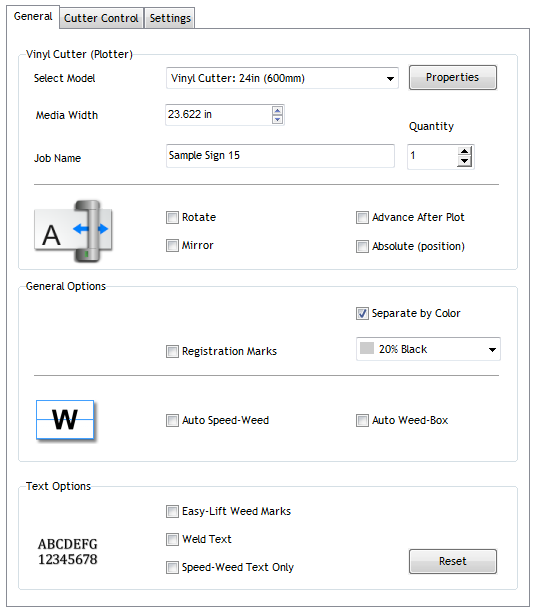
Set General Options |
|
 |
|
|
|
|
|
|
1. |
Select the Quantity
of Cutfiles you wish to send to the Vinyl
Spooler;
|
|
|
|
The quantity will appear in the
Vinyl Spooler and not the Send to Cut preview. |
|
|
|
|
|
|
|
 |
|
|
|
|
|
|
2. |
If you have multiple colors and
wish to cut these as separate pieces select Separate by
Color and the colorbar will populate with the colors of
the artwork, as shown directly above; |
|
|
3. |
If required select any of the
automated cutting features, as follows:
|
|
|
|
Auto
Speed-Weed: |
when checked applies a
Speed-Weed box to each object. |
|
Auto Weed-Box: |
when checked applies a
Weed-Box to each object. |
|
Registration
Marks: |
when checked applies a
Registration mark to each Cutfile for easy
alignment in situ. |
Important:
Each selection applies to all Cutfiles in the current
project. |
|
|
|
|
|
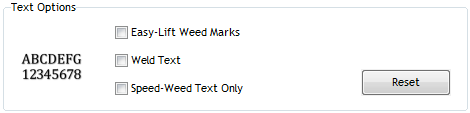
Set Text Options |
|
 |
|
|
|
|
|
|
|
If required select any of the
automated cutting of text features, as follows:
 |
|
|
|
|
Easy
Lift-Marks: |
when checked applies
special weeding marks to the holes of text
to greatly assist in weeding, as shown
directly above. |
|
Weld Text: |
when checked welds
(removes overlapping sections) of text,
ideal for cutting script based fonts which
tend to overlap at the tips of each glyph. |
|
Speed-Weed
Text only: |
when checked applies a
Speed-Weed box to text only. |
Important:
Each selection applies to all Cutfiles in the current
project. |
|
|
|
|
|
Cutter Control |
|
 |
|
|
|
|
|
|
• |
If required you can set the
Blade Offset, Force and Speed Options, as shown directly
above;
|
|
|
|
Important:
Each selection applies to all Cutfiles in the current
project. |
|
|
|
|
|
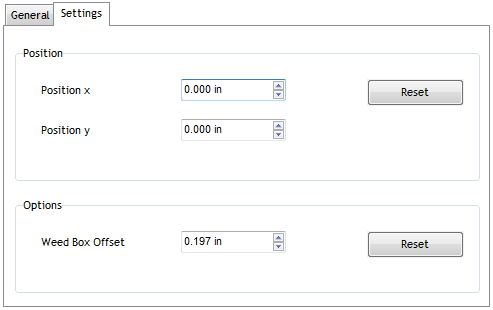
Set Position |
|
 |
|
|
|
|
|
|
• |
If required you can position
the Cutfile exactly where you want it to cut by
setting the x (horizontal axis),
and/or the y (vertical axis) by
setting a value, as shown directly
above;
|
|
|
• |
To set the Weed-Box Offset
that is located on in
the General Settings tab, set a value
as shown directly above;
|
|
|
|
Important:
Each selection applies to all Cutfiles in the current
project. |
|
|
|
|
|
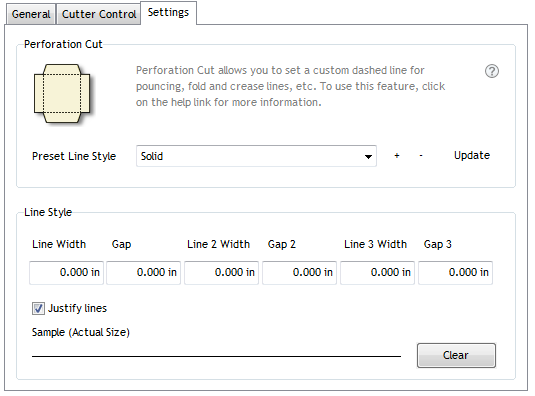
Perforation Cut |
|
 |
|
|
|
|
|
|
|
If required you can set cut
lines to be perforated i.e. as dashes, which is also
known as pouncing.
|
|
|
|
To set the perforation select
a Preset Line Style as shown
directly above, or set the Width
and Gap as required using the edit
boxes, also shown directly above.
|
|
|
|
Important: Each
selection applies to all Cutfiles in the current
project. |
|
|
|
|
|
Send to Cut |
• |
Once you are ready to cut the
artwork you have prepared, click
 to immediately cut the current page, or
 to send all the pages to the
Vinyl Spooler from where you can cut out each in
turn.
to send all the pages to the
Vinyl Spooler from where you can cut out each in
turn. |