|
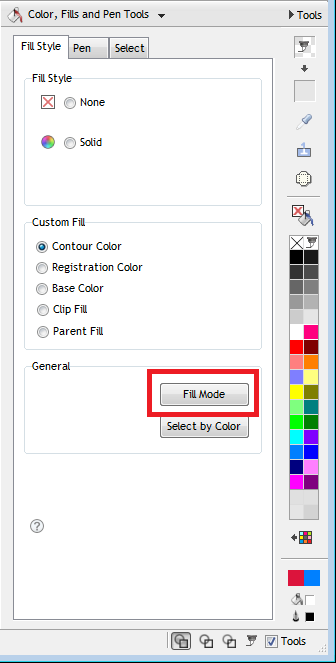
Texture Fill-Mode
With an Object selected that has an Image (Texture) fill, click
on the Fill Mode tool
 and you will see the Fill Mode Gizmo appear as shown
below:
and you will see the Fill Mode Gizmo appear as shown
below:
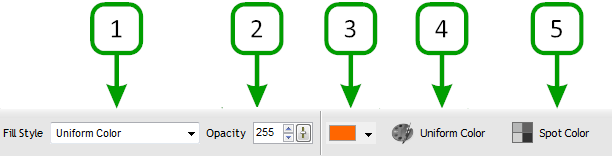
Texture Toolbar
You can also set the tools from the
2nd row when a Texture Fill is selected in Fill Mode, as explained below:
|
|
|
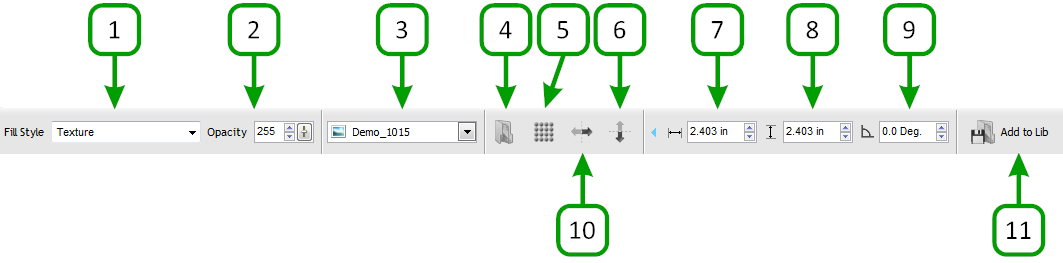
The circled
numbers (below) correspond with the numbers in green
which outline Fill Mode - Texture Fill |
|
Fill Style |
1 |
Selects from the available Fill
types and applies the selected Fill to the selected
Object |
|
Opacity |
2 |
Sets the level of transparency
i.e. how see-through the Object is |
|
Textures Library |
3 |
Opens the Texture Library from
where you can select from a library of existing textures |
|
Select Image |
4 |
Opens the Image Import window from
where you can select any Image (bitmap) as the Object's
Fill |
|
Tiling |
5 |
Sets the Texture to either Repeat
or to be a Single Tile |
|
Mirror Vertically |
6 |
Mirrors the Texture over the y
axis (vertical plane) |
|
Texture Width |
7 |
Sets the Width of the Texture
(provides for non-proportional sizing) |
|
Texture Height |
8 |
Sets the Height of the Texture
(provides for non-proportional sizing) |
|
Angle |
9 |
Sets the Angle of the Texture |
|
Mirror Horizontally |
10 |
Mirrors the Texture over the x
axis (horizontal plane) |
|
Save Image |
11 |
Opens the Texture Library where
you can save any Image (bitmap) in the Users
folder for later use |
These tools allow you to finely
adjust, edit and position the Texture fill along with
setting transparency and whether to repeat the fill. You
can also use any image (bitmap) as a fill and save this
off in the User's folder in the Texture's Library. |